碎碎念 Link to heading
经过一下午和一晚上的奋斗, 你现在看见的这个站就被我建好了

我实现了 Github, Cloud Flare, 的双重部署, 还购买了一个域名
这是我第一次建站, 过程怎么说呢……
离谱二字即可形容, 为啥建个静态站这么困难
还不是因为你菜
总之, 记下来留给有需要的人
感谢 ZIMK 的帮助, 以及墨雨提供的动机
好了, 接下来说说怎么搞
建立 Github 账号 Link to heading
有就直接用, 少废话
前往 Github 建立一个账号
新建一个项目 Link to heading
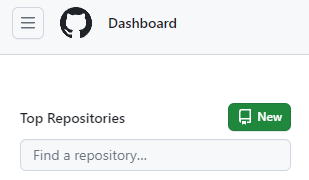
点击 New
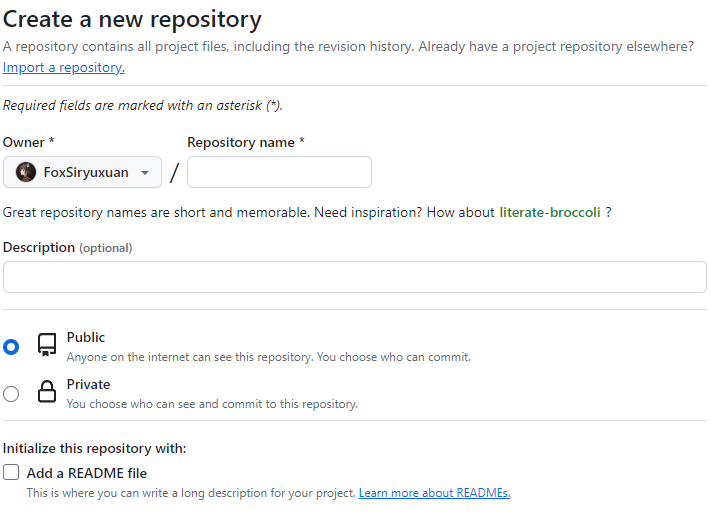
在 Repository name 里输入 “account.github.io”, 注意 “account” 为你自己的 github 用户名, 例如我的是 FoxSiryuxuan.github.io, 也就是说你们是可以通过 https://foxsiryuxuan.github.io/ 访问到我的博客的 (前提是你的网络情况好)
最后点击 Create repository 就可以了
安装 Git Link to heading
Windows 直接去官网下载安装, 别的系统自己想办法
安装完后用以下命令检验一下
>git version
>git version 2.43.0.windows.1
安装 hugo Link to heading
Windows Link to heading
直接利用 winget 安装, 没有的话就去 ms store 下一个
winget 是巨硬出品的 Windows 包管理器, 质量绝对好(确信)
>winget install Hugo.Hugo.Extended
别的系统我没用过, 你们可以去官网自己试试, 大体应该是没问题的
Chocolatey & Scoop Link to heading
有看官网写, 我没用过, 你想用的话应该没啥问题, 可能会有细微差别
Chocolatey Link to heading
>choco install hugo-extended
Scoop Link to heading
>scoop install hugo-extended
在安装完成后, 你可以使用这个命令检查一下
>hugo version
>hugo v0.121.2-6d5b44305eaa9d0a157946492a6f319da38de154+extended windows/amd64 BuildDate=2024-01-05T12:21:15Z VendorInfo=gohugoio
本地创建一个 Hugo 网站 Link to heading
运行
>hugo new site "your-site"		# "your-site" 你可以自定义(别问我中文行不行, 不怕 boom 就写)
>Congratulations! Your new Hugo site was created in C:\Users\users\site.

Just a few more steps...

1. Change the current directory to C:\Users\users\site.	# users 是你的用户名
2. Create or install a theme:
   - Create a new theme with the command "hugo new theme <THEMENAME>"
   - Install a theme from https://themes.gohugo.io/
3. Edit hugo.toml, setting the "theme" property to the theme name.
4. Create new content with the command "hugo new content <SECTIONNAME>\<FILENAME>.<FORMAT>".
5. Start the embedded web server with the command "hugo server --buildDrafts".

See documentation at https://gohugo.io/.
现在去 hugo 提供的主题官网挑一个你看的顺眼的主题
如果你完全不知道并且不想看/看不懂官方文档的话, 你最好和我选择一样的主题, 这玩意换个主题需要的配置文件什么的完全就不一样了(我体感上,
菜是原罪)
以下操作如果你一身反骨选择了和我不一样的主题, 那么如果出问题了, 你自己解决 (我想帮都帮不上, 我自己就菜)
放一个 Demo
git 主题 Link to heading
以下命令除非注明, 否则你就在 /your-site/, 文件夹下运行
cd your-site
运行
>git init
>git submodule add https://github.com/luizdepra/hugo-coder.git themes/hugo-coder
如果网络出现问题自己解决, 你可以找找 github 镜像站
写配置文件 Link to heading
如果你前面选择的主题和我不一样, 这一步你最好别按照我的来
在你的 “your-site” 目录下应该有个 config.toml, 将后缀改成 config.toml.bak 这一步是为了备份, 这种重要配置文件最好不要养成直接删除的习惯. 如果没有的话应该就是下面那个 hugo.toml 把 config.toml 替换了, 一样的操作, 改成 hugo.toml.bak
创建一个 hugo.toml
baseurl = "http://www.example.com"	# 你的 Github Page 网址 "https://account.github.io/"
title = "johndoe"	# 网页的标签名
theme = "hugo-coder"
languagecode = "en"	# 语言我没改过,但应该可以改
defaultcontentlanguage = "en"

paginate = 20

# disqusShortname = "yourdiscussshortname" # 注释掉 (我不知道是干啥的)

[markup.highlight]
style = "github-dark"

[params]
  author = "John Doe"	# 改成你的名字, 这是作者
  info = "Full Stack DevOps and Magician"	# 你的小简介, 我的是 "A normal guy"
  description = "John Doe's personal website"	# 你网站的简介
  keywords = "blog,developer,personal"
  avatarurl = "images/avatar.jpg"	# 你的头像, 路径在 /your-site/static/images/avatar.jpg, 没有就自己建, 记得头像命名为 "avatar", 你的图片是 .jpg, .png, 或者别的你就自己改, 别傻傻的 .png你也改成 .jpg
  #gravatar = "john.doe@example.com"	#邮箱, 你有需求就写

  faviconSVG = "/img/favicon.svg"	# 这几个应该都是关于你网站的 icon 的, 我的博客还没有 icon 呢, 如果真有人看到这里手上正好有觉得好看的 icon 可以找我哦, 我的 Telegram 群在主页了
  favicon_32 = "/img/favicon-32x32.png"
  favicon_16 = "/img/favicon-16x16.png"

  since = 2019	# 你网站的搭建年份, 好像是涉及版权之类的东西

  enableTwemoji = true

  colorScheme = "auto"
  hidecolorschemetoggle = false

  # customCSS = ["css/custom.css"]	# 记住这个, 一会要改字体用
  # customSCSS = ["scss/custom.scss"]
  # customJS = ["js/custom.js"]

[taxonomies]	# 这里不知道干嘛的, 我删了
  category = "categories"
  series = "series"
  tag = "tags"
  author = "authors"

# Social links
[[params.social]]	# 你主页的联系方式的 icon
  name = "Github"
  icon = "fa fa-github fa-2x"
  weight = 1
  url = "https://github.com/johndoe/"	# 点击这个 icon 跳转的链接
[[params.social]]
  name = "Gitlab"
  icon = "fa fa-gitlab fa-2x"
  weight = 2
  url = "https://gitlab.com/johndoe/"
[[params.social]]
  name = "Twitter"
  icon = "fa fa-twitter fa-2x"
  weight = 3
  url = "https://twitter.com/johndoe/"
[[params.social]]	# 我自己加的
  name = "Telegram"
  icon = "fa fa-telegram fa-2x"	# 不知道啥原理, 但这么写确实有用
  weight = 2
  url = "https://t.me/+IGPDl0LkDlU2ZmQ9"

# Menu links
[[menu.main]]
  name = "Blog"	# 你菜单的链接的名称
  weight = 1
  url  = "posts/"	# .md 文件存放的目录, /content/posts/, 下面那个同理
[[menu.main]]
  name = "About"
  weight = 2
  url = "about/"
找到 archetypes 文件夹, 编辑它
---

title: "{{replace .Name "-" " " | title }}"	#它可以让你下一步创建的文件名自动填写到 title 里

date: {{ .Date }}	# 自动获取时间

draft: false	# 将 true 修改为 false, 否则辛辛苦苦写的博客是看不见的, 没错, 它只是一个草稿

---
找到
/your-site/themes/hugo-coder/archetypes/
将里面俩文件删了
试运行 Link to heading
使用
>hugo server -w
来启动本地服务, 你可以通过 localhost:1313 来访问你的本地服务, 如果你成功看见一个正常的界面那么就恭喜你, 你成功了一半
- w 是指如果你的文件被修改, 它就会自动刷新网页, 很方便
现在, 你运行这个命令
>hugo new "posts/first.md"
就可以创建一个新博客文章了, 文章使用 Markdown 格式, 你可以使用 Typora, Visual Studio Code 等工具编辑它
其次, 你应该看到这么一行字
---

title: "first"

date: # 一串时间

draft: false

---
现在, 你可以编写一点东西, 然后去浏览器里, 在你的 blog 里应该就可以看见了
更改字体 Link to heading
你成功了大半了, 但是你会发现, 字体咋个么奇怪呢?
所以, 我们需要让字体更易读一点
你要是喜欢这种字体当我没说
先停止本地服务 “ctrl + c”
然后去这个网站找个字体下载下来, 我推荐文泉驿微米黑
将你下载的 .ttf 文件保存到你的 /static/fonts/, 目录下, 我根据个人习惯将下载下来的字体文件名改成了 “wenquanyimicrohei.ttf”
在 “/assets/css/” 目录下创建一个 “style.css” 文件, 里面写上
@font-face {	/*引用字体*/
    font-family: "wenquanyi";	/*给自己的字体取个好记得名字*/
    src: url("./static/fonts/wenquanyimicrohei.ttf") format("truetype");	/*你自己的字体文件*/
}

body {
    font-family: "wenquanyi";	/*使用字体*/
}
在找到根目录下的 “hugo.toml”
  # customCSS = ["css/custom.css"]	# 嗨嗨嗨, 来了哦, 将 "custom.css" 改为 "style.css", 然后取消注释
  # customSCSS = ["scss/custom.scss"]
  # customJS = ["js/custom.js"]
本地最后检查 Link to heading
运行
>hugo server -w
刷新 localhost:1313, 看看是不是一切正常, 如果一切正常我们离成功就差一步之遥了
推到 github 上 Link to heading
依次输入命令
>hugo
>cd public
>git init
>git remote add origin https://github.com/account/account.github.io.git	# account 是你的 github 账户名, 在最后加上".git"
>git add .
>git commit -m "随便写点啥, 比如日期"
>git push -u origin master
如果一切顺利, 你就可以在你的 https://account.github.io/ 上看到你的博客了(等一会, 部署有个时间的), 例如我的 https://foxsiryuxuan.github.io/
在 Cloud Flare 中部署 Link to heading
你需要一个 cloud flare 账号, 没有的去注册, 然后你就可以到这里
接下来, 你需要在侧边栏找到 “Workers and Pages”, 点进去, 选择 Pages, 连接到 github, 选择你的那个项目, 把名字一改, 例如我改成了 “foxsir”
点击部署
部署完成后你就获得了你的第二个静态博客, 例如我的是 https://foxsir.pages.dev/
购买域名 Link to heading
自行购买一个域名, 然后在 Cloud Flare “Workers and Pages” 选择你刚才的项目, 添加 custom domain, 用你刚才买的域名
大功告成 Link to heading
当你从你的域名看见你的博客页面的时候, 你就可以好好睡一觉了
记得把 “hugo.toml” 里的
baseurl = "http://account.github.io/"
改成你的域名
最后的一些补充 Link to heading
删除博客 Link to heading
如果你想删除博客, 那么你不应该只删除 /content/posts/ 里的文件, /public/posts/里你想删除.md文件对应的文件夹也一起删掉
更新博客 Link to heading
>hugo
>cd public
>git add .
>git commit -m "你知道写啥的"
>git push -u origin master
引用图片 Link to heading
有两种方式, 一种是图床, 一种是本地
图床我 (兜) 没 (里) 用 (没) 过 (钱), 所以用的本地
将图片保存至 /static/images/
例如 /static/images/foxsir.jpg 我自己这张图的实际路径是 /static/img/FoxSir.jpg
那么我们可以这么引用


1